Our goal for this page is to generate and utilize data for automated testing of the length, spacing and stroke feedback components. We’ll start by adding some new utilities to the Utils class in the com.acmemail.judah.cartesian_plane.test_utils package under the test source tree. These will include:
- The constant BASE_TEST_DATA_DIR, which defines the root for all test data in this project;
- The class method File getTestDataDir( String subpath ), which will, if necessary, create a subdirectory or sequence of subdirectories underneath BASE_TEST_DATA_DIR; and
- The class method boolean equals( BufferedImage image1, BufferedImage image2 ) which returns true if two BufferedImages are equal.
Next we’ll create a suite of applications in a new package underneath the test utils package, com.acmemail.judah.cartesian_plane.test_utils.fb_comp. Then we’ll write the actual JUnit tests for the components, which will go in the usual package under the test source tree, com.acmemail.judah.cartesian_plane.components.
GitHub repository: Cartesian Plane Part 16
Previous lesson: Cartesian Plane Lesson 16 Page 5 Custom Controls, Testing: Analysis
File Utilities
Among the new file utilities are the class constant BASE_TEST_DATA_DIR, which establishes the root directory for all test data, and class method getTestDataDir which utilizes the same logic we saw on the previous page for ensuring that a target directory and all of its parents have been correctly created, and rooted in the correct directory tree. If successful it returns a File object encapsulating the target subdirectory, otherwise it returns null:
public static File getTestDataDir( String subpath )
{
    File    testDir = new File( BASE_TEST_DATA_DIR, subpath );
    if ( !testDir.exists() )
        if ( !testDir.mkdirs() )
            testDir = null;
    return testDir;
}
Test Data Generation
Class FBCompTADetail
Test data generation is going to be based directly on FBCompTA from the previous section. And it will utilize FBCompTADetail exactly as implemented in our demo code. So the first thing we can do is copy the detail class into our new package, …test_utils.fb_comp. Recall that this is a serializable class, and, as such, declares that it implements the marker interface Serializable, and the class variable serialVersionUID:
public class FBCompTADetail implements Serializable
{
    private static final long serialVersionUID = 8492161342492933010L;

    private final double    propertyValue;
    private final double    weight;
    private final int       imageType;
    private final int[][]   raster;

    public FBCompTADetail(
        double propertyValue,
        double weight,
        BufferedImage image
    )
    {
        super();
        this.propertyValue = propertyValue;
        this.weight = weight;
        this.imageType = image.getType();

        int cols    = image.getWidth();
        int rows    = image.getHeight();
        this.raster = new int[rows][cols];
        for ( int row = 0 ; row < rows ; ++row )
            for ( int col = 0 ; col < cols ; ++col )
                raster[row][col] = image.getRGB( col, row );
    }

    public double getPropertyValue()
    {
        return propertyValue;
    }

    public double getWeight()
    {
        return weight;
    }

    public BufferedImage getBufferedImage()
    {
        int             cols    = raster[0].length;
        int             rows    = raster.length;
        BufferedImage   image   =
            new BufferedImage( cols, rows, imageType );
        for ( int yco = 0 ; yco < rows ; ++yco )
            for ( int xco = 0 ; xco < cols ; ++xco )
            {
                int rgb = raster[yco][xco];
                image.setRGB( xco, yco, rgb );
            }
        return image;
    }
}
Class FBCompTA
This is going to be an abstract class that does most of the work of generating test data. Subclasses merely provide configuration data, in the form of:
- The name of the target subdirectory, which is passed to the class constructor; and
- A method that returns a feedback component to be used in test data generation; this corresponds to the abstract method getFeedbackInstance declared in FBCompTA:
public abstract Feedback
    getFeedbackInstance( DoubleSupplier supplier );
Here is the entirety of the subclass that encapsulates configuration for testing the LengthFeedback component:
public class FBCompLengthTA extends FBCompTA
{
    public static final String  SUBDIR      = "Length";
    public static void main(String[] args)
    {
        SwingUtilities.invokeLater( FBCompLengthTA::new );
    }
    public FBCompLengthTA()
    {
        super(SUBDIR);
    }
    @Override
    public Feedback getFeedbackInstance( DoubleSupplier supplier )
    {
        Feedback    feedback    = new LengthFeedback( supplier );
        return feedback;
    }
}
Let´s look first at the GUI composition for the FBCompTA class. The frame´s content pane is a JPanel with a BorderLayout; only the Center and South regions of the BorderLayout are utilized. The panel at the center of the content pane (the descriptor panel) has a vertical BoxLayout. Each component in the center panel is another JPanel decribing:

- The class name of the feedback component that is the target of testing;
- The parameters currently used to configure the feedback component under test:
- The value property (length, spacing or stroke);
- The weight of the feedback line(s) if used (recall that the StrokeFeedback component doesn’t use the weight value);
- The name of the directory in which test data is to be stored;
- The name of the next file to be used when the Save button is pushed; and
- The currently configured feedback component.
The panel at the south of the content pane (the control panel) consists of spin components to control the value and weight of the target component, and buttons to save a particular configuration or exit the application. If the weight property is not in use, the weight spinner is disabled. Each time the value or weight spinner changes, the feedback control is updated, as are the value and weight labels in the descriptor panel. When the Save button is pushed, the configuration data is saved to the file indicated by the data file descriptor, the file sequence number is updated, and the data file descriptor changes to reflect the updated file name. As indicated, pushing the Exit button terminates the application; there are no messages regarding saved or unsaved configurations.
Let’s look at the first few declarations in the FBCompTA class. They are all related to either the target feedback component, or file configuration. They are listed below, followed by annotations.
1 2 3 4 5 6 7 8 9 10 11 12 13 14 15 16 17 | public abstract class FBCompTA { public abstract Feedback getFeedbackInstance( DoubleSupplier supplier ); public static final Dimension COMP_SIZE = new Dimension( 100, 25 ); public static final String FEEDBACK_DIR = "Feedback"; private static final String fileNamePrefix = "TestData"; private static final String fileNameExt = ".ser"; private static final String fileNameFmt = "%s%04d%s"; private final String dataSubdir; private final File dataFileDir; private int fileNameSeq = 1; private File dataFile; // ... } |
- Lines 3,4: This is the abstract method required to be implemented by all concrete subclasses. It is utilized in the constructor to create the feedback component under test.
- Lines 6,7: The dimensions to be applied to the target feedback component. It is declared as a constant so that it can be synchronized with applications and JUnit tests that need to access the generated data.
- Line 8: The name of the directory under which all feedback component test data are to be organized. It is declared as a constant so that it can be synchronized with applications and JUnit tests that need to access the generated data. Recall that this directory will contain no data files. Instead it will be parent to subdirectories Length, Spacing and Stroke which will contain the data files.
- Lines 9,10: The data file name prefix and extension. Together with the file name sequence number (line 14) they are used to form the name of a data file, for example:
TestData0001.ser - Line 11: The format specification, to be used with String.format, to format a file name. It is utilized in method getDataFile:
public void getDataFile()
{
    String  name    = String.format(
        fileNameFmt,
        fileNamePrefix,
        fileNameSeq++,
        fileNameExt
    );
    dataFile = new File( dataFileDir, name );
    fileDescriptor.setText( dataFile.getName() );
}- Line 12: The name of the subdirectory that will be used to store generated data. It is initialized in the constructor.
- Line 13: The path to the subdirectory that will be use to store generated data, for example:
test_data/Feedback/Length
It is initialized in method makeFilePath, with the assistance of getTestDataDir in the Utils class; recall that this method (getTestDataDir) ensures that a path to the subdirectory exists. If it fails, it returns null.
private File makeFilePath()
{
    String  subPath = FEEDBACK_DIR + "/" + dataSubdir;
    File    path    = Utils.getTestDataDir( subPath );
    if ( path == null )
    {
        String  message = "Failed to create path " + subPath;
        System.err.println( message );
        System.exit( 1 );
    }

    return path;
}- Line 14: The file name sequence number. Each time the Save button is pushed the current value of this field is used to create a file name, then it is incremented (see getDataFile, above).
The following declarations are used to create the spinners in the application GUI, and are directly related to tracking the current property value (length, spacing or stroke) and weight; see the notes following the figure. See also the code for method getControlPanel, below.
1 2 3 4 5 6 7 8 9 10 11 12 13 | private static double minVal = 1; private static double maxVal = 500; private final SpinnerNumberModel valModel = new SpinnerNumberModel( 10, minVal, maxVal, 1 ); private final JSpinner valSpinner = new JSpinner( valModel ); private static double minWeight = 1; private static double maxWeight = 500; private final SpinnerNumberModel weightModel = new SpinnerNumberModel( 1, minWeight, maxWeight, 1 ); private final JSpinner weightSpinner = new JSpinner( weightModel ); |
- Lines 1,2: The minimum and maximum values supported by the spinner that controls the property value.
- Lines 3,4: SpinnerModel used in the JSpinner that controls the property value. In the constructor, it is used as the DoubleSupplier for the target feedback control:
    feedback = getFeedbackInstance( () ->
        valModel.getNumber().doubleValue()
); - Lines 5,6: The JSpinner that controls the property value. In the method getControlPanel it is incorporated into a ChangeListener that updates the target feedback component and the label that displays the property value (valueDecriptor):
valSpinner.addChangeListener( e -> feedback.repaint() );
- Lines 8,9: The minimum and maximum values supported by the spinner that controls the feedback component’s weight.
- Lines 10,11: SpinnerModel used in the JSpinner that that controls the feedback component’s weight.
- Lines 12,13: JSpinner that controls the feedback component’s weight. In the method getControlPanel it is given a ChangeListener that updates the target feedback component:
    weightSpinner.addChangeListener( e -> {
float weight = weightModel.getNumber().floatValue();weightDescriptor.setText( "" + weight );
feedback.repaint();});
For the record, here is the code for the getControlPanel referenced above. I have included only the code that is used to configure the fields; the remainder of the method consists of arranging components in the panel, and giving it a border.
1 2 3 4 5 6 7 8 9 10 11 12 13 14 15 16 17 18 19 20 21 22 23 24 25 26 | private JPanel getControlPanel() { JButton save = new JButton( "Save" ); JButton exit = new JButton( "Exit" ); valSpinner.addChangeListener( e -> feedback.repaint() ); valSpinner.addChangeListener( e -> { float val = valModel.getNumber().floatValue(); valueDescriptor.setText( "" + val ); }); float currWeight = feedback.getWeight(); weightSpinner.addChangeListener( e -> { float weight = weightModel.getNumber().floatValue(); feedback.setWeight( weight ); weightDescriptor.setText( "" + weight ); feedback.repaint(); }); if ( currWeight < 0 ) weightSpinner.setEnabled( false ); else weightModel.setValue( currWeight ); save.addActionListener( this::saveActionPerformed ); exit.addActionListener( e -> System.exit( 0 ) ); // ... } |
The last of our field declarations consist of the target feedback component itself, and the JLabels that display the values in the center of the application’s GUI. Declarations and annotations are listed below.
1 2 3 4 5 6 7 | private final JLabel dirDescriptor = new JLabel(); private final JLabel fileDescriptor = new JLabel(); private final JLabel classDescriptor = new JLabel(); private final JLabel valueDescriptor = new JLabel(); private final JLabel weightDescriptor = new JLabel(); private final Feedback feedback; |
- Line 1: Label that displays the name of the directory in which data files are stored. It is initialized in method getDescriptorPanel and never changed:
    String dirName = dataFileDir.getPath();
dirDescriptor.setText( dirName ); - Line 2: Label that displays the name of the file to write to the next time the Save button is pushed. It is updated in method getDataFile:
    dataFile = new File( dataFileDir, name );
fileDescriptor.setText( dataFile.getName() ); - Line 3: Label that displays the class name of the target feedback component. It is initialized in method getDescriptorPanel and never changed:
    String simpleName = feedback.getClass().getSimpleName();
classDescriptor.setText( simpleName ); - Line 4: Label that displays the feedback component’s property value. It is initialized in method getDescriptorPanel:
    float numValue = valModel.getNumber().floatValue();
    valueDescriptor.setText( "" + numValue );
It is updated every time the JSpinner that controls the property value changes. As discussed earlier, this is accomplished via a ChangeListener added to the JSpinner in method getControlPanel. - Line 4: Label that displays the feedback component’s weight. It is initialized in method getDescriptorPanel:
    float weightValue = feedback.getWeight();
    weightDescriptor.setText( "" + weightValue );
It is updated every time the JSpinner that controls the weight changes. As discussed earlier, this is accomplished via a ChangeListener added to the JSpinner in method getControlPanel.
To finish up our look at this application, let’s see the logic that gets executed when the Save button is pushed. The main method for executing this logic is saveActionPerformed. The code for it, and notes, follow.
1 2 3 4 5 6 7 8 9 10 11 12 13 14 15 16 17 18 19 20 21 22 23 24 25 26 27 28 29 30 31 32 33 34 35 36 37 | private void saveActionPerformed( ActionEvent evt ) { BufferedImage image = getBufferedImage(); float currVal = valModel.getNumber().floatValue(); FBCompTADetail detail = new FBCompTADetail( currVal, feedback.getWeight(), image ); try ( FileOutputStream fileStream = new FileOutputStream( dataFile ); ObjectOutputStream outStream = new ObjectOutputStream( fileStream ); ) { outStream.writeObject( detail ); String dest = dataFile.getAbsolutePath(); System.out.println( "Wrote object " + dest ); } catch ( IOException exc ) { exc.printStackTrace(); fileDescriptor.setText( "Error: " + exc.getMessage() ); } // Set up the next data file getDataFile(); } private BufferedImage getBufferedImage() { int type = BufferedImage.TYPE_INT_RGB; BufferedImage image = new BufferedImage( COMP_SIZE.width, COMP_SIZE.height, type ); Graphics graphics = image.createGraphics(); feedback.paintComponent( graphics ); return image; } |
- Line 3: Obtains an image of the target feeback component (see line 29, below).
- Line 4: Gets the current value of the component property.
- Lines 5,6: Creates a TACompDetail object that encapsulates the target feedback component.
- Lines 8-13: Try-with-resources block that establishes an ObjectStream for writing the TACompDetail object.
- Lines 15-17: Writes the detail object to a file, and records the name of the file.
- Lines 19-23: Detects and records any IOException thrown in the case of an error while writing the file.
- Line 26: Increments the file sequence number, and generates a file name with the new sequence number; updates the fileDescriptor field (see getDataFile, above).
- Lines 31-34: Creates a BufferedImage and associated graphics context for obtaining an image of the target feedback component.
- Line 35: Gets an image of the target feedback component.
Any details about this application that we haven’t discussed relate directly to GUI initialization. If your curious, you can find them in the GitHub repository.
Concrete Subclasses
The concrete subclasses of FBCompTA that configure and initiate test data gathering are:
- FBCompLengthTA: initiates test data gathering for the LengthFeedback component;
- FBCompSpacingTA: initiates test data gathering for the SpacingFeedback component;
- FBCompStrokeTA: initiates test data gathering for the StrokeFeedback component.
We’ve already looked at FBCompLengthTA, above. The other two subclasses are virtually identical, and can be found in the GitHub repository.
Examining Test Data
Class FBCompTAVisualizer

The FBCompTAVisualizer class is an abstract class that is used to examine feedback component test data. Its three concrete subclasses provide configuration data to drive the application. They are:
- LengthDataVisualizer for examining LengthFeedback component test data;
- SpacingDataVisualizer for examining SpacingFeedback component test data; and
- StrokeDataVisualizer for examining StrokeFeedback component test data.
The only configuration parameters that the class requires are the path to the directory in which to find data files, and a reference to a method to obtain a feedback component. The constructor for FBCompTAVisualizer begins like this: public FBCompTAVisualizer( String subdir, Function<DoubleSupplier,Feedback> fbSupplier
where subdir is the path to the subdirectory where test data files can be found, and fbSupplier is a reference to a method that requires an argument of type DoubleSupplier and returns an object of type Feedback. Here is the complete code for LengthDataVisualizer, the concrete subclass that manages the configuration for examining LengthFeedback component test data.
public class LengthDataVisualizer extends FBCompTAVisualizer
{
    public static void main(String[] args)
    {
        SwingUtilities.invokeLater( LengthDataVisualizer::new );
    }

    public LengthDataVisualizer()
    {
        super( FBCompLengthTA.SUBDIR, s -> getComponent( s ) );
    }

    private static Feedback getComponent( DoubleSupplier supplier )
    {
        Feedback    feedback    = new LengthFeedback( supplier );
        return feedback;
    }
}
The content pane for the application GUI is a JPanel with a BorderLayout; only the Center and South regions of the BorderLayout are utilized (see FBCompTAVisualizer, above). The Center region is divided into two JPanels, the parameter panel on the left, and the review panel on the right. The parameter panel displays the class name of the target feedback component, the name of the subdirectory where test data files are found, the name of the current file being examined, and the property value and weight from the test data file.
The review panel is divided into two rows. The first row displays the target feedback component as configured using data from the test file. The second row displays two images: on the left is the expected image, as encapsulated in the test file, and on the right is the actual image derived from the feedback component displayed in the first row.
The South region of the content pane contains a status label on the left; it will be either Success or Fail, depending on whether or not the expected and actual images are equal, as determined by Utils.equals( BufferedImage, BufferedImage ). The Next button is used to traverse the test data files from the source subdirectory (more about that, below), and the Exit button is used to terminate the application.
The annotated field declarations for FBCompTAVisualizer are listed below.
1 2 3 4 5 6 7 8 9 10 11 12 13 14 15 16 17 18 19 20 21 22 23 24 25 26 27 | public abstract class FBCompTAVisualizer { private static final String baseSubdir = Utils.BASE_TEST_DATA_DIR + "/" + FBCompTA.FEEDBACK_DIR; private final File subdir; private final File[] allFiles; private int nextFileInx = 0; private final Feedback feedback; private final JFrame frame = new JFrame(); private final JLabel expFeedback = new JLabel(); private final JLabel actFeedback = new JLabel(); private final JLabel testClass = new JLabel(); private final JLabel testDir = new JLabel(); private final JLabel currFile = new JLabel(); private final JLabel currVal = new JLabel(); private final JLabel currWeight = new JLabel(); private final JLabel result = new JLabel(); private final JButton next = new JButton( "Next" ); private BufferedImage expImage; private BufferedImage actImage; private float value = 0; private float weight = 0; // ... } |
- Lines 3,4: The base directory for organizing all test data related to feedback components. It is composed of the root test data directory declared in the Utils class, concatenated with the subdirectory named in the FBCompTA class:
test_dir/Feedback - Line 5: The name of the subdirectory where test files are stored for a specific component: Length, Spacing or Stroke. The name of the subdirectory is passed to the FBCompTAVisualizer constructor.
- Line 6: An array listing all the test data files in subdir. It is initialized in the constructor (see below).
- Line 7: A field for indexing into the allFiles array. It is incremented every time the Next button is pushed.
- Line 9: The feedback component being displayed.
- Line 10: The GUI’s top level window. It is initialized in the constructor, and reconfigured each time a new test file is read.
- Line 11: The label that displays (as an Icon) the expected image as derived from the current test file. It is updated in the nextFile method each time a test file is deserialized:
expImage = detail.getBufferedImage(); - Line 12: The label that displays (as an Icon) the actual image as derived from the target feedback component. It is updated in the getActualImage method, which is invoked by nextFile every time a test file is deserialized (see below).
- Line 13: The class name of the target feedback component. It is set in method getParameterPanel and never changed:
String simpleName = feedback.getClass().getSimpleName();testClass.setText( simpleName ); - Line 14: The name of the subdirectory in which test files are found. It is set in method getParameterPanel and never changed:
String dirName = subdir.getName();testDir.setText( dirName ); - Line 15: The name of the test file from which configuration data was most recently read. It is set in method nextFile:
currFile.setText( nextFile.getName() ); - Line 16: The property value obtained from the most recently deserialized test data file. It is set in method nextFile:
final String fmt = "%3.1f";value = (float)detail.getPropertyValue();String strValue = String.format( fmt, value );currVal.setText( strValue ); - Line 17: The weight parameter obtained from the most recently deserialized test data file. It is set in method nextFile:
final String fmt = "%3.1f";weight = (float)detail.getWeight();String strWeight = String.format( fmt, weight );currWeight.setText( strWeight ); - Line 18: The result of comparing the expected image to the actual image, Success or Fail. It is updated in the selectAction method every time a radio button is selected.
if ( Utils.equals( expImage, actImage ) )result.setText( "Success" );elseresult.setText( "Fail" ); - Line 20: The Next button. Configured in method getControlPanel:
next.addActionListener( e -> nextFile() ); - Line 22: The expected image, as derived from the most recently deserialized test data file. Updated in method nextFile each time a new file is read.
- Line 23: The actual image, as derived directly from the target feedback component. Updated in method getActualImage (see below) each time a new file is read.
- Line 24: The property value assigned to the target feedback component. Updated in method nextFile each time a new file is read.
- Line 25: The weight assigned to the target feedback component. Updated in method nextFile each time a new file is read.
The code to make an image of the currently configured feedback component is not much different from what we’ve already seen:
- Make a BufferedImage using the size of the feedback component;
- Get a graphics context from the BufferedImage and pass it to the component’s pantComponent method. In this version of the logic we make sure that the component is fully realized before calling getComponent:
if ( feedback.getWidth() > 0)
If it has not been fully realized our BufferedImage will just be a black rectangle, but it will be updated as soon as we call nextFile (see nextFile, below). - Create an ImageIcon from the BufferedImage, and use it to update the actFeedback label in the review panel.
Here’s the code for this method.
private void getActualImage()
{
    int             width       = FBCompTA.COMP_SIZE.width;
    int             height      = FBCompTA.COMP_SIZE.height;
    int             type        = expImage.getType();
    actImage = new BufferedImage( width, height, type );
    if ( feedback.getWidth() > 0)
    {
        Graphics        graphics    = actImage.createGraphics();
        feedback.paintComponent( graphics );
    }

    ImageIcon       icon        = new ImageIcon( actImage );
    actFeedback.setIcon( icon );
}
The constructor for this application is responsible for:
- Obtaining a list of all relevant test files. It assumes that at least one test file exists;
- Instantiating and configuring the target feedback component;
- Initializing the GUI; and
- Loading the first file in the list of test files.
Here’s the annotated code.
1 2 3 4 5 6 7 8 9 10 11 12 13 14 15 16 17 18 19 20 21 22 23 24 25 26 27 28 | public FBCompTAVisualizer( String subdir, Function<DoubleSupplier,Feedback> fbSupplier ) { File baseDir = new File( baseSubdir ); this.subdir = new File( baseDir, subdir ); if ( !this.subdir.exists() ) { String msg = "Test directory doesn't exist: " + this.subdir.getName(); System.err.println( msg ); System.exit( 1 ); } allFiles = this.subdir.listFiles( (d,f) -> f.endsWith( ".ser" ) ); if ( allFiles.length == 0 ) { String msg = "Directory has no test files: " + this.subdir.getName(); System.err.println( msg ); System.exit( 1 ); } feedback = fbSupplier.apply( () -> value ); feedback.setPreferredSize( FBCompTA.COMP_SIZE ); makeGUI(); nextFile(); } |
- Line 2: This parameter, provided by the subclass, denotes the subdirectory in which target test files reside, e.g. Length.
- Line 3: Reference to a method that requires a DoubleSupplier argument, and returns a Feedback component.
- Line 6: Instantiates a File object that encapsulates the path to the directory used to organize all test data files for all Feedback components: test_dir/Feedback.
- Line 7: Instantiates a File object that encapsulates the path to the subdirectory that contains all the data files to process at this time, e.g. test_dir/Feedback/Length. Note that we now have an object that encapsulates a virtual path; the physical path may or may not exist.
- Lines 8-14: Verifies that the target subdirectory exists. In order for the application to work properly there must be at least one test file, implying that the subdirectory must exist. If it does not we print an error message and terminate the application.
- Line 15: Obtains a list of all test data files in the target subdirectory; we are assuming that all test files have a file extensions of .ser. The method we use to obtain the list is File.listFiles( FileNameFilter filter ), where FileNameFilter is a functional interface that requires 1) a File argument that refers to a directory; 2) a String argument that refers to the name of a file within the given directory; and 3) returning a boolean value. In our lambda expression, (d,f) -> f.endsWith( “.ser” ), d is a directory (type File) and f is the name of a file (a String) in the directory. The listFiles(FileNameFilter) method returns an array of type File containing all files in subdir for which f.endsWith(“.ser”) is true. (Note: we are not using d, but it still has to be present.) Compare this method to similar File methods:
- String[] list() which returns an array of the names of all files in a directory;
- String[] list(FilenameFilter filter) which returns an array of the names of all files in a directory which passes the FilenameFilter;
- File[] listFiles() which returns an array of all files in a directory; and
- File[] listFiles(FileFilter filter) which returns an array of all files in a directory that pass the FileFilter.
- Lines 16-22: Tests the length of the array returned by listFiles; if it is 0, prints an error message and terminates the application.
- Line 24: Instantiates the target feedback component.
- Line 25: Sets the size of the target feedback component.
- Line 26: Creates and shows the GUI.
- Line 27: Loads the first file in the allFiles array (see nextFile, below).
Here is the annotated code for the nextFile method.
1 2 3 4 5 6 7 8 9 10 11 12 13 14 15 16 17 18 19 20 21 22 23 24 25 26 27 28 29 30 31 32 | private void nextFile() { final String fmt = "%3.1f"; if ( nextFileInx < allFiles.length ) { File nextFile = allFiles[nextFileInx++]; FBCompTADetail detail = getDetail( nextFile ); value = (float)detail.getPropertyValue(); weight = (float)detail.getWeight(); String strWeight = String.format( fmt, weight ); String strValue = String.format( fmt, value ); currVal.setText( strValue ); currWeight.setText( strWeight ); currFile.setText( nextFile.getName() ); expImage = detail.getBufferedImage(); feedback.setWeight( weight ); expFeedback.setIcon( new ImageIcon( expImage ) ); feedback.repaint(); getActualImage(); frame.pack(); if ( nextFileInx == allFiles.length ) next.setEnabled( false ); if ( Utils.equals( expImage, actImage ) ) result.setText( "Success" ); else result.setText( "Fail" ); result.repaint(); System.out.println( result.getText() ); } } |
- Line 3: This is the format string which, when used with String.format, creates the text used to display the property value and the weight, for example:
    FBCompTADetail  detail      = getDetail( nextFile );
    weight = (float)detail.getWeight();
    String          strWeight   = String.format( fmt, weight );
currWeight.setText( strWeight );- Line 4: Makes sure that the index into the allFiles array is valid. See also line 6, where the index is used to get a file from the array, and is then incremented.
- Line 6: Deserializes the next file from the allfFles array; obtains the FBCompTADetail object from the deserialized file (see also method getDetail, below).
- Lines 8-11: Gets the property value and weight figures from the detail object, and converts them to strings.
- Lines 12-13: Updates the currWeight and currVal labels in the parameter panel of the GUI.
- Line 14: Updates the currFileName label in the parameter panel of the GUI.
- Line 15: Obtains the expected BufferedImage from the detail object.
- Line 17: Sets the weight in the target feedback component.
- Line 18: Sets the expected image in the review panel.
- Line 19: Updates the target feedback component. Note that the feedback component has two parameters which need to be updated:
- The current weight, which we set on line 17; and
- The current property value; this parameter is set by the DoubleSupplier that was provided when we instantiated the feedback component:
feedback = fbSupplier.apply( () -> value );
- Line 20: Updates the review panel with the actual image derived from the current state of the feedback component. (See getActualImage, above.)
- Line 21: Updates the frame, which will be required if any of the updated components (e.g. the labels in the parameter panel, the images in the review panel) have changed size.
- Line 22: If the files in the allFiles array have been fully processed, disables the Next button.
- Lines 25-28: Compares the expected image to the actual image, and updates the result label in the control panel.
- Line 29: Updates the feedback component.
- Line 30: Records the result of comparing the expected and actual images.
The getDetail method deserializes a test data file, obtaining the encapsulated FBCompTADetail object. It’s not much different from similar methods we have already seen. Here’s the code with some brief notes.
1 2 3 4 5 6 7 8 9 10 11 12 13 14 15 16 17 18 19 20 21 22 23 24 25 26 27 | private FBCompTADetail getDetail( File file ) { FBCompTADetail detail = null; try ( FileInputStream fileStream = new FileInputStream( file ); ObjectInputStream inStream = new ObjectInputStream( fileStream ); ) { Object obj = inStream.readObject(); if ( !(obj instanceof FBCompTADetail) ) { String className = obj.getClass().getName(); String error = "Unexpected object type: " + className; System.err.println( error ); System.exit( 1 ); } detail = (FBCompTADetail)obj; } catch ( IOException | ClassNotFoundException exc ) { exc.printStackTrace(); System.exit( 1 ); } return detail; } |
- Lines 4-8: Try-with-resources block, which obtains an ObjectInputStream for deserializing the given file.
- Line 10: Deserializes the given file.
- Lines 11-18: Validates the deserialization result. If the result is invalid (i.e., not a FBCompTADetail object) prints an error message and terminates the application.
- Lines 21-25: Catches any error raised by the readObject method invoked on line 10. If necessary, prints a diagnostic and terminates the application.
GUI Details
Below find some quick notes about the visualizer’s GUI. You can find the complete code in the GitHub repository.

The GUI consists of a single top-level window, a JFrame. The frame’s content pane is a JPanel with a BorderLayout. The center region of the border layout contains the center panel, and the southern region contains the control panel; see method makeGUI().
The Center Panel has a BoxLayout/X-Axis layout. It is divided into a Parameter Panel and a Review Panel; see method getCenterPanel().

The Parameter Panel has a TitledBorder and a BoxLayout/Y-Axis layout. It is divided into five JPanels, each of which has an empty border, a BoxLayout/X-Axis layout and two JLabels. See methods getParameterPanel() and getParameterPanel(String, JLabel ).
The Review Panel has a TitledBorder and a BoxLayout/Y-Axis layout. It is divided into two JPanels, the Feedback Panel, which contains the target feedback component, and the Image Panel. See method getReviewPanel().
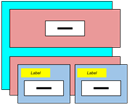
The Image Panel has an EmptyBorder and a BoxLayout/X-Axis layout. It is divided into two panels, the Expected Image Panel and the Actual Image Panel. Each of these panels has a LineBorder and two labels. The Expected Image Panel has a descriptive label (“Expected”) and the expFeedback label, which contains an icon representing the expected image. The Actual Image Panel has a descriptive label (“Actual”) and the actFeedback label, which contains an icon representing the actual image. See methods getImagePanel(), getExpectedPanel() and getActualPanel().

The Control Panel has the result label, the Next button and the Exit button. See method getControlPanel().
JUnit Tests
class FeedbackTest
It should come as no surprise that our strategy for testing is going to be based on:
- The abstract class FeedbackTest, which will do most of the work; and
- Concrete subclasses of FeedbackTest, one for each feedback component:
- LengthFeedbackTest, SpacingFeedbackTest and StrokeFeedbackTest
The concrete subclasses will each have a BeforeAll method which calls the class method initAll in the Feedback class passing the configuration data. You’ll recognize the signature of initAll from the constructors of some of the classes we recently developed:
    public static void initAll(
        String subdir,
        Function<DoubleSupplier,Feedback> fbSupplier
    )
Where subdir is the subdirectory containing the target test data (e.g. “Length”) and fbSupplier is a reference to a method to instantiate the target feedback component. Note that method initAll in the FeedbackTest class is going to create the necessary GUI components, so it must be invoked from the Event Dispatch Thread (EDT). Here is the complete code for LengthFeedbackTest:
public class LengthFeedbackTest extends FeedbackTest
{
    @BeforeAll
    public static void beforeAll()
    {
        GUIUtils.schedEDTAndWait( () ->
            FeedbackTest.initAll(
                FBCompLengthTA.SUBDIR,
                s -> new LengthFeedback( s )
            )
        );
    }
}
Many of the fields declared in the FeedbackTest class are going to be class fields. There are two reasons for this:
- Method initAll in the FeedbackTest class is going to be invoked from a BeforeAll method; BeforeAll methods must be static, therefore initAll must be static and any field initialized by initAll must be static; and
- Jumping ahead a bit, we’re going to be using a new JUnit feature (new to us, that is): @MethodSource( methodName ) where methodName must be the name of a static method (and, of course, any fields referred to by the method must be static).
Here are the fields and annotations for the FeedbackTest class.
1 2 3 4 5 6 7 8 9 10 11 12 13 | public abstract class FeedbackTest { private static final String baseSubdir = Utils.BASE_TEST_DATA_DIR + "/" + FBCompTA.FEEDBACK_DIR; private static String strSubdir; private static File[] allFiles; private static Feedback feedback; private static double currVal = 0; private static double currWeight = -1; private BufferedImage expImage; private BufferedImage actImage; // ... |
- Lines 3,4: This is the path to the subdirectory that organizes all test data files for all feedback components.
- Line 5: This is the name of the subdirectory within baseSubdir where test data files for a specific feedback component are stored. It is initialized in the initAll method which is called by the concrete subclasses.
- Line 6: This is an array that will store references to all files in strSubdir. It is initialized in the loadFiles method which is invoked from the initAll method.
- Line 7: This is the feedback component which will be configured with data from deserialized test files, and from which an actual image will be generated for comparison to an expected image (lines 11 and 12, below). The component is initialized in the initAll method, and configured in the nextFile method.
- Lines 8,9: These fields hold the property value and weight obtained from a deserialized test file; they are updated in the nextFile method.
- Line 11: The expected image; obtained from a deserialized test data file. Updated in the nextFile method.
- Line 12: The actual image; obtained from the target feedback component (Line 7). It is updated in the getActualImage method.
Here is the annotated code for initAll and its helper method loadFiles.
1 2 3 4 5 6 7 8 9 10 11 12 13 14 15 16 17 18 19 20 21 22 23 24 25 26 27 28 | public static void initAll( String subdir, Function<DoubleSupplier,Feedback> fbSupplier ) { strSubdir = subdir; loadFiles(); feedback = fbSupplier.apply( () -> currVal ); feedback.setPreferredSize( FBCompTA.COMP_SIZE ); JFrame frame = new JFrame(); JPanel contentPane = new JPanel(); contentPane.add( feedback ); frame.setContentPane( contentPane ); frame.pack(); } private static void loadFiles() { File base = new File( baseSubdir ); File subdir = new File( base, strSubdir ); String msg = "Test directory doesn't exist: " + subdir.getName(); assertTrue ( subdir.exists(), msg ); allFiles = subdir.listFiles( (d,f) -> f.endsWith( ".ser" ) ); msg = "Directory has no test files: " + subdir.getName(); assertTrue( allFiles.length > 0, msg ); } |
- Line 6: Initializes the strSubdir field from information provided by the subclass.
- Line 7: Loads the files from the subdirectory indicated by the subclass.
- Line 8: Initializes the feedback component using the supplier provided by the subclass.
- Line 9: Configures the preferred size of the feedback component.
- Lines 10,11: Creates the JFrame and the content pane that will contain the feedback component.
- Line 12: Adds the feedback component to the content pane.
- Line 13: Sets the content pane in the JFrame.
- Line 14: Packs the JFrame; this will realize the feedback component, giving it a definite size.
- Line 15: Note that there is no need to make the JFrame visible.
- Line 19: Encapsulates the base directory path for all feedback component test data (test_dir/Feedback) in a File object.
- Line 20: Encapsulates the path to the directory containing test data files for the specific feedback component under test (e.g. test_dir/Feedback/Length).
- Lines 21-23: Verifies that the target subdirectory exists.
- Line 25: Obtains an array of File objects corresponding to all the .ser files located in the target subdirectory.
- Lines 26,27: Verifies that the test directory contains at least one test file.
The method for deserializing a file, getDetail, is pretty much the same as logic we’ve already looked at (see, for example, getDetail in the FBCompTAVisualizer class, above). The only thing different we’re doing this time is using assertions to validate the input process. See lines 11 and 16 in the code below.
1 2 3 4 5 6 7 8 9 10 11 12 13 14 15 16 17 18 19 | private FBCompTADetail getDetail( File file ) { FBCompTADetail detail = null; try ( FileInputStream fileStream = new FileInputStream( file ); ObjectInputStream inStream = new ObjectInputStream( fileStream ); ) { Object obj = inStream.readObject(); assertTrue( obj instanceof FBCompTADetail ); detail = (FBCompTADetail)obj; } catch ( IOException | ClassNotFoundException exc ) { fail( exc.getMessage() ); } return detail; } |
Likewise, the method we use to take a picture of the target feedback component, getActualImage, is essentially the same as the methods we’ve seen several times now. See, for example, getActualImage in the FBCompTAVisualizer class, above.
Here is the annotated code for the method that we use to deserialize a file, and use its data to configure the state of our unit test:
1 2 3 4 5 6 7 8 9 10 11 12 13 14 15 16 17 18 19 20 | private void nextFile( File nextFile ) { FBCompTADetail detail = getDetail( nextFile ); currVal = detail.getPropertyValue(); currWeight = detail.getWeight(); expImage = detail.getBufferedImage(); feedback.setWeight( (float)currWeight ); feedback.repaint(); actImage = getActualImage(); StringBuilder bldr = new StringBuilder(); bldr.append( "Dir: ").append( strSubdir ); bldr.append( ", File: ").append( nextFile.getName() ); bldr.append( ", Value: " ).append( currVal ); bldr.append( ", Weight: ").append( currWeight ); String msg = bldr.toString(); System.out.println( msg ); assertTrue( Utils.equals( expImage, actImage ), msg ); } |
- Line 3: Deserializes the given file, obtaining a FBCompDetail object.
- Lines 4-6: Obtains the property value, weight and BufferedImage from the detail object. Recall that currVal is the DoubleSupplier that keeps the feedback component in synch with our data; therefore, the next time the component is repainted, this value will dictate the length of the line(s) incorporated in the display of the component.
- Line 8: Sets the component’s weight.
- Line 9: Repaints the target fedback component; afterwards the component’s display will reflect the new property value and weight.
- Line 10: Gets a copy of the image displayed in the feedback component.
- Lines 12-17: Constructs a string that describes the current test data.
- Line 18: Records the current test data.
- Line 19: Validates the actual image against the expected image.
That leaves our @Test method to be discussed. One way we might have written this test is with a loop that traverses the allFiles array. But that would mean having a single unit test for all data files. How can we arrange for a distinct unit test for each data file? We can use a @ParameterizedTest with a source that gives us the files to test against one at a time. We’ll do that, giving the test a data source that consists of the array of files converted to a Stream<File>. The source will be supplied by a method; it’s fairly simple, and looks like this:
    private static Stream<File> getFiles()
    {
        return Stream.of( allFiles );
    }
The start of our parameterized test specifies the name of this method as the data source. The name of the method is provided as a String, and it must refer to a class (static) method:
    @ParameterizedTest
    @MethodSource( "getFiles" )
    void test( File file )
    // ...
Our test code invokes nextFile once, for each File in the stream. It turns out that nextFile gives us complete test coverage of the code in the Feedback class and the subclass under test (LengthFeedback, for example) except for getWeight and isOpaque. So after calling nextFile we’ll throw in a quick test for each of those methods. Here’s the complete code.
@ParameterizedTest
@MethodSource( "getFiles" )
void test( File file )
{
    GUIUtils.schedEDTAndWait( () -> nextFile( file ) );
    assertEquals( currWeight, feedback.getWeight() );
    assertTrue( feedback.isOpaque() );
}
Concrete Subclasses of FeedbackTest
Now we have the almost trivial task of writing the JUnit test classes for the three subclasses of the abstract Feedback class:
- LengthFeedbackTest
- SpacingFeedbackTest
- StrokeFeedbackTest
We’ve already seen the code for LengthFeedbackTest; see LengthFeedbackTest, above. The other two tests are nearly identical; you can find them in the GitHub repository.
Summary
On this we page looked at applications for generating and examining test data for the Feedback component classes. They are:
- Abstract class FBCompTA and its three concrete subclasses for generating data:
- FBCompLengthTA
- FBCompSpacingTA
- FBCompStrokeTA
- Abstract class FBCompTAVisualizer and its three concrete subclasses for examining data:
- LengthDataVisualizer
- SpacingDataVisualizer
- StrokeDataVisualizer
And we looked at unit tests for the feedback components, consisting of:
- Abstract class FeedbackTest and its three concrete classes:
- LengthFeedbackTest
- SpacingFeedbackTest
- StrokeFeedbackTest
On the next page we’ll put the feedback components to work in developing a GUI for configuring the visual details of the lines of our CartesianPlane application, LinePropertiesPanel.