In this tutorial, you will learn a basic design pattern for displaying graphics in Java.
Note: Much of the following code can be utilized without fully understanding all the underlying details. We’ll create two classes, Canvas and Root, that can be implemented and reused and that contain all the boilerplate for setting up a basic graphics application.
GitHub repository: https://github.com/JackStraub1954/JudahsTutorials/tree/version2/GraphicsBootstrap
Unit 1: How to display a drawing
Goal: Write a program to display this figure:

1. Get a window to draw in: the Canvas class
First off, what is a window? By one definition, a window is a rectangular area on the screen. A window consists of rows and columns of pixels, similar to the Cartesian plane that you learned in math class. In fact, each column is addressed as an x-coordinate, and each row as a y-coordinate. The two differences between the Cartesian plane and a window are:

- The origin (0, 0) of a window is the upper-left corner of the window.
- Y-coordinate values increase as you move towards the bottom of the window.
By the way, negative coordinates are perfectly acceptable, but you can’t see anything displayed at negative coordinates.
We’re going to use Java Swing to create a window. The components of Swing (literally, class JComponent) create windows of different sizes and types. We’ll be using a JPanel. To make it possible to draw in our window, we’ll create the Canvas class, which will be a subclass of JPanel. Our first version of the Canvas class is shown below. For now, we’ll simply add a constructor that sets the size of the window.
1 2 3 4 5 6 7 8 9 10 11 | import java.awt.Dimension; import javax.swing.JPanel; public class Canvas extends JPanel { public Canvas( int width, int height ) { Dimension dim = new Dimension( width, height ); setPreferredSize( dim ); } } |
Note that we don’t set the window size directly; we set the preferred size. (Yes, there is also a setSize, which you may use depending on the layout manager you are using. See also: Laying Out Components Within a Container, in the Oracle Java Tutorial.)
2. Get a Frame to Hold the Canvas

If you want to show your window on the screen, you will need a frame; in Swing, this is encapsulated by the JFrame class. The frame around some portion of a graphical user interface (GUI) is the first thing you see when you start a GUI application. It includes the title bar, minimize, maximize, and close buttons, as well as the resize handles. The body of the frame is occupied by a content pane; in our application, a JPanel will be the content pane.
Our JFrame will be encapsulated in the Root class. This class will implement the Runnable interface. Implementing an interface usually means writing one or more methods with given signatures. The Runnable interface requires you to write a run method: public void run. (See also: Interfaces, in the Oracle Java Tutorial.) Here’s the outline of our Root class:
1 2 3 4 5 6 7 8 9 10 11 12 13 14 15 16 17 18 19 20 21 22 23 | public class Root implements Runnable { /** The application frame. */ private JFrame frame = null; /** The window that we will be drawing on. */ private JPanel userPanel = null; public Root( JPanel userPanel ) { this.userPanel = userPanel; } public void start() { // ... } // required by "implements Runnable" public void run() { // ... } } |
The constructor is used to identify the visible portion of your application; for us, that’s an instance of Canvas. The run method is where the GUI is laid out, and the start method invokes it, resulting in the frame being displayed. We need a start method and a run method because the start method schedules the run method to be executed by Java on a separate thread. (A thorough knowledge of threads isn’t needed for this application, and a discussion of them is beyond the scope of this tutorial. For more information, see Concurrency in the Oracle Java Tutorial.) There are a couple of class methods in the SwingUtilities class that can be used to schedule the run method; we will be using SwingUtilities.invokeLater. Here is the start method in its entirety:
    public void start()
    {
        SwingUtilities.invokeLater( this );
    }
When configuring the GUI, the run method is where the action is. You don’t need a thorough understanding of the code; you can just copy it into your application. Nevertheless, here’s some detail about the operation.
These are the tasks that must be performed by the run method:

- Create a JFrame. The constructor we use will also specify a title to display in the frame’s title bar.
- Set a default close operation on the JFrame. Our default close operation will say “on close, exit from the application.” This is important; if you skip this step, when you close your frame (by picking the close button in the title bar), the frame will disappear, but your application will continue to run.
- Create a content pane.
- Set a layout manager on the content pane. Layout managers are used to fine-tune the position and size of components (push buttons, labels, text boxes, et al.) in a window. A FlowLayout arranges components from left to right and top to bottom, as space allows. A GridLayout places components in rows and columns, like a spreadsheet. We’ll use a BorderLayout, which divides the pane into five parts: Center, North, South, East, and West. To begin with, we’ll use only the center section to display your Canvas. Later, we might use the remaining parts to introduce Swing components, such as push buttons and text boxes, to control the application. See also A Visual Guide to Layout Managers, in the Oracle Java Tutorial.
- Layout the GUI components, i.e., establish their positions and sizes. This takes place when we call the frame’s pack method.
- Make the frame visible.
Here is the run method for our application:
1 2 3 4 5 6 7 8 9 10 11 12 13 14 15 16 17 18 19 20 21 22 23 24 25 26 27 28 29 30 31 32 33 34 35 36 37 38 | /** * Required by the Runnable interface. * This method is the place where the initial content * of the frame must be configured. */ public void run() { /* Instantiate the frame. */ frame = new JFrame( "Graphics Frame" ); /* * This will cause your application to be terminated * when the frame is closed. If you forget this step, * when you close the frame it will disappear, * but your application will continue to run. */ frame.setDefaultCloseOperation( JFrame.EXIT_ON_CLOSE ); /* * A layout manager is responsible for fine-tuning the * layout of a panel. For now you should consider this * to be boilerplate for our application. To learn more * about layout managers see the Oracle tutorial at * https://docs.oracle.com/javase/tutorial/uiswing/layout/index.html. * see the JDK documentation. */ BorderLayout layout = new BorderLayout(); contentPane = new JPanel( layout ); /* Make the Canvas a child of the content pane. */ contentPane.add( userPanel, BorderLayout.CENTER ); /* Set the content pane in the frame. */ frame.setContentPane( contentPane ); /* Initiate frame sizing, positioning etc. */ frame.pack(); /* Make the frame visible. */ frame.setVisible( true ); } |
3. Canvas.paintComponent(Graphics graphics): Boilerplate
Every time your window needs to be redrawn, Java calls the paintComponent method in the JPanel class. Recall that Canvas is a subclass of JPanel. To draw your graphics, you want to override the paintComponent method. When invoking paintComponent, Java passes you a graphics context. This is a crucial element of your application. You use it to paint things with color, to fill and draw the edges of geometric figures, to draw text in a variety of fonts, and perform many other graphical operations. A couple of important words about the graphics context:
- When Java programmers originally designed the graphics system, the graphics context type was class Graphics. Bazillions of programmers across the known universe wrote paintComponent methods like this: public paintComponent(Graphics graphics). Time passed and the Java overlords decided they needed something more advanced than the original Graphics class, so they invented the Graphics2D class… but what to do about all the millions of lines of code that declared paintComponent with a parameter of type Graphics? The solution was to make Graphics2D a subclass of Graphics, pass the Graphics2D object to paintComponent, and make it clear to Java programmers that it’s really a Graphics2D and they can treat it as such if they want the more advanced functionality. So in many modern paintComponent methods, you will see the graphics parameter cast to type Graphics2D:
(Graphics2D)graphics. - The paintComponent method can freely modify the state of the graphics context any way it wants. Each time the method is called, the graphics context is set to its default state*.
*A previous version of this tutorial stated incorrectly that the graphics context must be returned to its original state before the paintComponent method exits. This is unnecessary. See Getting Started with Graphics in the Oracle Java tutorial.
There are certain operations that must be performed at the beginning and end of the paintComponent method; I would consider these boilerplate that you can copy into whatever version of the Canvas class that you create now or in the future. They are:
- Call the paintComponent method in the superclass.
- Paint the window with your favorite background color (see below for a brief discussion of colors). In my sample application, I will store the desired background color in an instance variable. Note that the user may resize the window while you’re not looking. To paint the window effectively, you will need to determine its current width and height; fortunately, you can get these values from the JPanel superclass. Once again, to facilitate the development of helper methods, I like to put these in instance variables.
- YOUR BRILLIANT GRAPHICS GO HERE!
import java.awt.Color;
import java.awt.Dimension;
import java.awt.Graphics;
import java.awt.Graphics2D;

import javax.swing.JPanel;

@SuppressWarnings("serial")
public class CanvasBoilerplate extends JPanel
{
    private final Color     bgColor     = new Color( .9f, .9f, .9f );

    private int             currWidth;
    private int             currHeight;
    private Graphics2D      gtx;

    /**
     * Constructor. Sets the initial height and width of this Canvas.
     * Note that the user can always change the geometry after the
     * window is displayed.
     *
     * @param width		initial width of this window
     * @param height	initial height of this window
     */
    public CanvasBoilerplate( int width, int height )
    {
        Dimension   dim = new Dimension( width, height );
        setPreferredSize( dim );
    }

    /**
     * This method is where you do all your drawing.
     * Note the the window must be COMPLETELY redrawn
     * every time this method is called;
     * Java does not remember anything you previously drew.
     *
     * This simple example merely draws and fills a rectangle
     * which occupies some proportion of the window.
     * To substitute your own work, KEEP THE CODE THAT IS
     * MARKED BOILERPLATE, and substitute your code
     * for the code that displays the rectangle.
     *
     * @param graphics  Graphics context, for doing all drawing.
     */
    @Override
    public void paintComponent( Graphics graphics )
    {
        super.paintComponent( graphics );
        currWidth = getWidth();
        currHeight = getHeight();
        gtx = (Graphics2D)graphics;
        gtx.setColor( bgColor );
        gtx.fillRect( 0,  0, currWidth, currHeight );
    }
}
Note: We’ll talk about color in the next lesson. For a preview, see Java Color Primer
5. Jumping Ahead: the Main Class
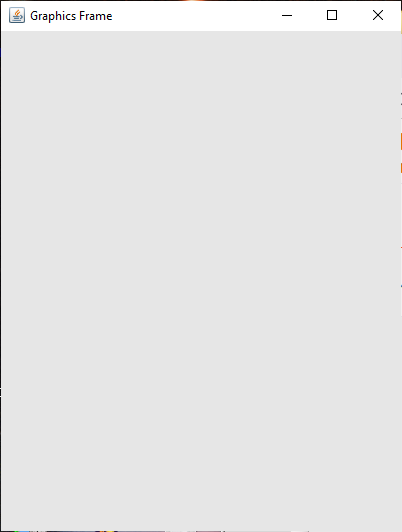
Before finishing the paintComponent method, let’s make sure what we have so far works. To this end, we’ll write a Main class that contains the main method that will launch our application. It’s simple enough; all we have to do is instantiate Canvas and Root objects, the call the start method in the Root object. We’ll give the Canvas a width of 600 pixels and a height of 500 pixels:
1 2 3 4 5 6 7 8 9 | public class Main { public static void main(String[] args) { CartesianPlane canvas = new CartesianPlane( 600, 500 ); Root root = new Root( canvas ); root.start(); } } |
If you execute the above code, you should see the figure below.
6. Finishing the paintComponent Method
To finish our first graphics application, we have to center a rectangle in the Canvas window, then fill it and draw its edge. The width and height of the rectangle will be 60% of the width and height of the window:
int rectWidth   = (int)(currWidth * .6);
int rectHeight  = (int)(currHeight * .6);
We’ll also need edge and fill colors, and an edge width. Rather than hard-coding them, let’s make these values instance variables:
private final Color bgColor     = new Color( .9f, .9f, .9f );
private final Color fillColor   = Color.BLUE;
private final Color edgeColor   = Color.BLACK;
private final int   edgeWidth   = 3;
Next, we need to find the coordinates of the upper-left corner of the rectangle. To position it horizontally, we need to find the difference between the window width and the rectangle width, then allocate half of that to the left of the rectangle. To position it vertically, we do the same with the heights of the window and rectangle:
int     rectXco     = (currWidth - rectWidth) / 2;
int     rectYco     = (currHeight - rectHeight) / 2;
In order to draw the edge of the rectangle, we’ll need a Stroke object. Stroke is an interface type, so it can’t be instantiated directly; we’ll need to instantiate a type that implements Stroke. For us, that’s BasicStroke. The argument to the BasicStroke constructor, type float, tells Java the weight (width) of the stroke. After creating the stroke, it has to be set in the graphics context:
Stroke  stroke = new BasicStroke( edgeWidth );
gtx.setStroke( stroke );
Here is our completed paint component method.
1 2 3 4 5 6 7 8 9 10 11 12 13 14 15 16 17 18 19 20 21 22 23 24 25 26 27 28 29 30 31 32 33 34 35 36 37 38 39 40 41 42 43 44 45 46 47 48 | /** * This method is where you do all your drawing. * Note the the window must be COMPLETELY redrawn * every time this method is called; * Java does not remember anything you previously drew. * * @param graphics Graphics context, for doing all drawing. */ @Override public void paintComponent( Graphics graphics ) { // begin boilerplate super.paintComponent( graphics ); currWidth = getWidth(); currHeight = getHeight(); gtx = (Graphics2D)graphics; gtx.setColor( bgColor ); gtx.fillRect( 0, 0, currWidth, currHeight ); // end boilerplate // Fill and draw a rectangle that is 60% // the current width and height of this window. int rectWidth = (int)(currWidth * .6); int rectHeight = (int)(currHeight * .6); // To center the rectangle horizontally in the window, find // the difference between rectWidth and currWidth, // then allocate half of it to the left of the rectangle. // Similarly, center the rectangle vertically using the // rectHeight and currHeight. int rectXco = (currWidth - rectWidth) / 2; int rectYco = (currHeight - rectHeight) / 2; // To draw the edge of the rectangle you'll need a // Stroke object, which determines the edge width. Stroke stroke = new BasicStroke( edgeWidth ); // Fill the rectangle before drawing the edge. gtx.setColor( fillColor ); gtx.fillRect( rectXco, rectYco, rectWidth, rectHeight ); gtx.setStroke( stroke ); gtx.setColor( edgeColor ); gtx.drawRect( rectXco, rectYco, rectWidth, rectHeight ); |