In this lesson, we will start writing code to display the Cartesian Plane. When we get done, we’ll have a working program that draws grid lines where they belong on the plane. This lesson assumes that you have completed or have equivalent knowledge of the topics discussed on the Java Graphics Bootstrap page.
The material below uses color extensively. For an introduction to how Java deals with colors, see A Java Color Primer.
GitHub repository: Cartesian Plane Part 2
Previous lesson: Cartesian Plane Lesson 1: Starting the Cartesian Plane Project
Drawing the Grid Lines
Goal: Write a program to display the grid lines in this figure:
1. Simple Line Drawing
This project will require a lot of groundwork. But doing all that paperwork before seeing a result can be frustrating. So, let’s begin with a program that displays grid lines. We’ll start the paperwork in the next lesson. Grid lines will be drawn at the horizontal and vertical center of the display, where the x- and y-axes will eventually be drawn.
I started this part of the project by copying Canvas.java and Root.java from the Java Graphics Bootstrap project and renaming Canvas to GridLines_01. For this first part of the lesson, I need to know some information up front:
- What color are the grid lines going to be? (I have arbitrarily chosen a very light gray.)
- How thick will the lines be? (This is the line weight, also known as the stroke; a good value is 1 pixel.)
- What will be the spacing between the lines? (I have arbitrarily chosen 40 pixels; this will change later.)
So, how do we begin? We have to start with paintComponent in the GridLines_01 class. So should we go there, set the color and weight, and draw the lines 40 pixels apart? No. First, we need the instance variables to represent the above three properties:
    private Color gridColor   = new Color( .75f, .75f, .75f );
    private float gridSpacing = 40;
    private float gridWeight  = 1;
Note: With rare exceptions, instance variables should be private. It is a bad habit among Java programmers to (lazily) avoid declaring the visibility of an instance variable. Another bad habit is, purely for convenience, making an instance variable visible to anything other than the class itself.
Next, we ultimately have to complete a lot of work in paintComponent, and it’s a good idea to break that work into individual pieces and encapsulate each piece in a helper method. I’m going to call my first helper method drawGrid. Putting in a stub for drawGrid (a stub is a minimal bit of code that does nothing except allow your class to be compiled), here is my preliminary shot at GridLines_01.
public class GridLines_01 extends JPanel
{
    private Color           bgColor     = new Color( .9f, .9f, .9f );
    private Color           gridColor   = new Color( .75f, .75f, .75f);

    private float           gridSpacing = 40;
    private float           gridWeight  = 1;

    private int             currWidth;
    private int             currHeight;
    private Graphics2D      gtx;

    public GridLines_01( int width, int height )
    {
        Dimension   dim = new Dimension( width, height );
        setPreferredSize( dim );
    }

    /**
     * This method is where you do all your drawing.
     * Note that the window must be COMPLETELY redrawn
     * every time this method is called;
     * Java does not remember anything you previously drew.
     *
     * @param graphics  Graphics context, for doing all drawing.
     */
    @Override
    public void paintComponent( Graphics graphics )
    {
        // begin boilerplate
        super.paintComponent( graphics );
        currWidth = getWidth();
        currHeight = getHeight();
        gtx = (Graphics2D)graphics;
        gtx.setColor( bgColor );
        gtx.fillRect( 0,  0, currWidth, currHeight );
        // end boilerplate

        drawGrid();
    }

    private void drawGrid()
    {
        // ...
    }
}
Another note regarding visibility: helper methods should always be declared private. Failing to do so is a sign of laziness.
Inside of drawGrid, let’s start by drawing vertical lines from the top of the window to the bottom (don’t forget to set the line weight and color in the graphics context). One of the lines must be located at the center (where the y-axis goes), and then lines must be drawn to the left and right, with gridSpacing pixels between them. Here’s one way draw the lines to the right of center:
1 2 3 4 5 6 7 8 9 10 11 12 | private void drawGrid() { gtx.setColor( gridColor ); gtx.setStroke( new BasicStroke( gridWeight ) ); float centerXco = currWidth / 2f; for ( float xco = centerXco ; xco <= currWidth ; xco += gridSpacing ) { Line2D gridLine = new Line2D.Float( xco, 0, xco, currHeight ); gtx.draw( gridLine ); } } |
Note: When working on a project, particularly one where you’re working with an unfamiliar language or API, don’t wait until you finish a big task before executing your code. Stop frequently, and ensure that the code you have written so far works as you expected it to. Deal with individual problems early before they stack up on you. For this project, I would (in fact, I did):
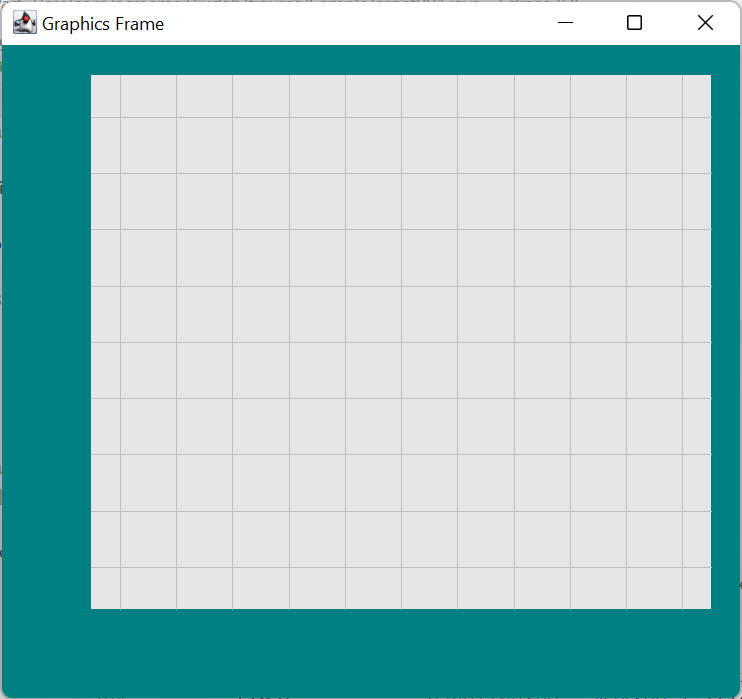
- Ensure your base program executes and displays a blank window before you begin the drawGrid method.
- Before finishing drawGrid, verify that the code you have written so far draws vertical lines on the right side of the window.
Of interest in the code above is that we want to treat the window width as a decimal value when cutting it in half. We accomplished that by coding the divisor as type float:
centerXco = currWidth / 2fTo complete drawing the vertical lines, we could write another loop that moves from the center of the window to the left:
for ( float xco = centerXco ; xco >= 0 ; xco -= gridSpacing )
{
    Line2D  gridLine    = new Line2D.Float( xco, 0, xco, currHeight );
    gtx.draw( gridLine );
}
However, I don’t find that very elegant. It would be better to figure out the x-coordinate of the line farthest to the left and write a single loop from the leftmost line to the rightmost.
This would be a good exercise for the student to complete before looking at the solution below.
To find the left-most x-coordinate, figure out how many vertical lines will be drawn left of center; that’s half the window’s width divided by the grid spacing (currWidth / 2f / gridSpacing). But that gives a fractional number of lines; we need the whole number of lines less than or equal to the fractional number. The Math.floor function gives us that:
float numLeft = (float)Math.floor( currWidth / 2f / gridSpacing );Here’s the code for the drawGrid() method so far:
1 2 3 4 5 6 7 8 9 10 11 12 13 14 | private void drawGrid() { gtx.setColor( gridColor ); gtx.setStroke( new BasicStroke( gridWeight ) ); float centerXco = currWidth / 2f; float numLeft = (float)Math.floor( currWidth / 2f / gridSpacing ); float leftXco = centerXco - numLeft * gridSpacing; for ( float xco = leftXco ; xco <= currWidth ; xco += gridSpacing ) { Line2D gridLine = new Line2D.Float( xco, 0, xco, currHeight ); gtx.draw( gridLine ); } } |
Next, of course, we have to draw the horizontal grid lines. The code for that is similar to the above, swapping grid-width and grid-height, and x- and y-coordinates.
This would be a good exercise for the student to complete before looking at the solution below.
1 2 3 4 5 6 7 8 9 10 11 12 13 14 15 16 17 18 19 20 21 22 23 | private void drawGrid() { gtx.setColor( gridColor ); gtx.setStroke( new BasicStroke( gridWeight ) ); float centerXco = currWidth / 2f; float numLeft = (float)Math.floor( currWidth / 2f / gridSpacing ); float leftXco = centerXco - numLeft * gridSpacing; for ( float xco = leftXco ; xco <= currWidth ; xco += gridSpacing ) { Line2D gridLine = new Line2D.Float( xco, 0, xco, currHeight ); gtx.draw( gridLine ); } float centerYco = currHeight / 2f; float numTop = (float)Math.floor( currHeight / 2f / gridSpacing ); float topYco = centerYco - numTop * gridSpacing; for ( float yco = topYco ; yco <= currHeight ; yco += gridSpacing ) { Line2D gridLine = new Line2D.Float( 0, yco, currWidth, yco ); gtx.draw( gridLine ); } } |
2. Add Margins to the Drawing
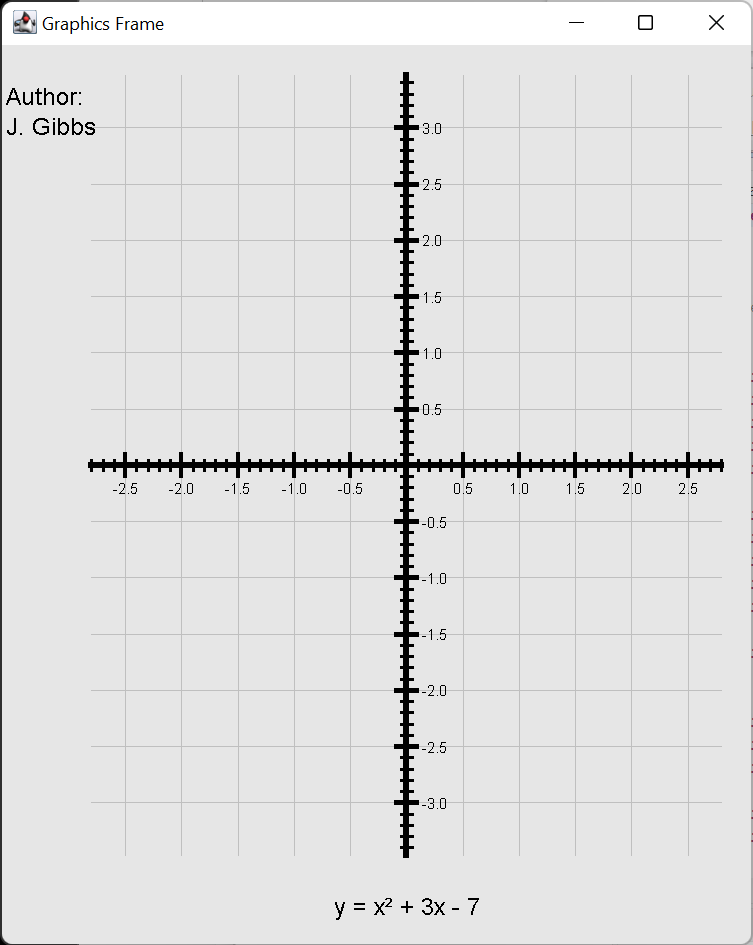
The next step is to add margins to the drawing (the colorful areas in Figure 1: Goal for this Lesson). The margins are partly to improve the look of the drawing and partly to give us space to write notes on the drawing, such as in the accompanying figure. That’s why the margins in Figure 1 are of different sizes; the two are for looks, the two wide ones are for notes.
To start, we’ll make instance variables to represent the size of the four margins:
private int     leftMargin          = 60;
private int     rightMargin         = 20;
private int     topMargin           = 20;
private int     bottomMargin        = 60;
Note also that the logic for drawing the grid lines has to be tweaked; the left edge of the rectangle containing the grid, for example, is no longer located at x = 0, and the top is no longer at y = 0. Let’s also think ahead a little bit; all the calculations that we do for positioning the grid lines are going to have to be performed for drawing the axes, the tic marks (the lines across the x- and y-axes), and the labels on the tic marks. So, let’s also make instance variables that describe the shape of the rectangle that holds the grid. Since this shape might be different every time we draw inside it (because the operator can resize the window), the values of these variables will have to be calculated each time the paintComponent method is called. Here are the new variables and the logic in paintComponent that calculates the shape of the rectangle; for now, I have chosen arbitrary values for the widths of the four margins:
1 2 3 4 5 6 7 8 9 10 11 12 13 14 15 16 17 18 19 20 21 22 23 24 25 26 27 28 29 30 31 32 33 34 35 36 37 38 39 40 41 42 | private int leftMargin = 60; private int rightMargin = 20; private int topMargin = 20; private int bottomMargin = 60; /////////////////////////////////////////////////////// // // The following values are recalculated every time // paintComponent is invoked. // /////////////////////////////////////////////////////// private int currWidth; private int currHeight; private Graphics2D gtx; // These variables describe the shape of the rectangle, exclusive // of the margins, in which the grid is drawn. Their values // are recalculated every time paintComponent is invoked. private float gridWidth; // width of the rectangle private float gridHeight; // height of the rectangle private float centerXco; // center x-coordinate private float minXco; // left-most x-coordinate private float maxXco; // right-most x-coordinate private float centerYco; // center y-coordinate private float minYco; // top-most y-coordinate private float maxYco; // bottom-most y-coordinate // ... @Override public void paintComponent( Graphics graphics ) { // ... // Describe the rectangle containing the grid gridWidth = currWidth - leftMargin - rightMargin; minXco = leftMargin; maxXco = minXco + gridWidth; centerXco = minXco + gridWidth / 2f; gridHeight = currHeight - topMargin - bottomMargin; minYco = topMargin; maxYco = minYco + gridHeight; centerYco = minYco + gridHeight / 2f; // ... } |
The drawGrid method requires little adjustment. Take the first for loop, for example:
- Instead of calculating the value of numLeft based on currWidth, we use the new variable gridWidth.
- Instead of limiting the for loop using currWidth, we use gridWidth.
- Instead of drawing the vertical lines using yco1 = 0 and yco2 = currHeight, we use yco1 = minYco and yco2 = maxYco.
Here’s what the first for loop looks like:
1 2 3 4 5 6 7 8 9 10 11 12 13 14 | private void drawGrid() { gtx.setColor( gridColor ); gtx.setStroke( new BasicStroke( gridWeight ) ); float numLeft = (float)Math.floor( gridWidth / 2 / gridSpacing ); float leftXco = centerXco - numLeft * gridSpacing; for ( float xco = leftXco ; xco <= maxXco ; xco += gridSpacing ) { Line2D gridLine = new Line2D.Float( xco, minYco, xco, maxYco ); gtx.draw( gridLine ); } // ... } |
Revising the second for loop requires a similar strategy:
This would be a good exercise for the student to complete before considering the following solution.
- Instead of calculating the value of numTop based on currHeight, we use the new variable gridHeight.
- Instead of limiting the for loop using currHeight we use gridHeight.
- Instead of drawing the horizontal lines using xco1 = 0 and xco2 = currWidth, we use xco1 = minXco and xco2 = maxXco.
Here’s what we have for drawGrid so far:
private void drawGrid()
{
    gtx.setColor( gridColor );
    gtx.setStroke( new BasicStroke( gridWeight ) );

    float   numLeft = (float)Math.floor( gridWidth / 2 / gridSpacing );
    float   leftXco = centerXco - numLeft * gridSpacing;
    for ( float xco = leftXco ; xco <= maxXco ; xco += gridSpacing )
    {
        Line2D  gridLine    =
            new Line2D.Float( xco, minYco, xco, maxYco );
        gtx.draw( gridLine );
    }

    float   numTop  = (float)Math.floor( currHeight / 2f / gridSpacing );
    float   topYco  = centerYco - numTop * gridSpacing;
    for ( float yco = topYco ; yco <= maxYco ; yco += gridSpacing )
    {
        Line2D  gridLine    =
            new Line2D.Float( minXco, yco, maxXco, yco );
        gtx.draw( gridLine );
    }
}
3. Add Unit-based Calculation
So far, we’ve limited all our calculations to pixels. But the users of our code aren’t really interested in pixels; they want to position things in terms of units. For example, they’re not going to tell us they want grid lines drawn at pixels 100, 200, and 300; they’re going to tell us to draw grid lines at x = 1.0, x = 1.5, and x = 2.0. At some point, they will also tell us what they want for a scale, for example, 1 unit = 50 pixels; then, when they say they want a grid line drawn at x = 1.5 we’ll have to figure out that we want to draw a grid line at the pixel on the x-axis that corresponds to 75 pixels to the right of the y-axis in the grid.
So let’s replace the gridSpacing instance variable with two new variables (with, for now, arbitrarily chosen values):
private float   gridLinesPerUnit    = 2;
private float   pixelsPerUnit       = 75;
Now, in the drawGrid method, we can dynamically calculate gridSpacing = pixelsPerUnit / gridLinesPerUnit, and now grid lines are drawn per unit rather than per pixel. And our final drawGrid method looks like this:
1 2 3 4 5 6 7 8 9 10 11 12 13 14 15 16 17 18 19 20 21 22 23 24 | private void drawGrid() { gtx.setColor( gridColor ); gtx.setStroke( new BasicStroke( gridWeight ) ); float gridSpacing = pixelsPerUnit / gridLinesPerUnit; float numLeft = (float)Math.floor( gridWidth / 2 / gridSpacing ); float leftXco = centerXco - numLeft * gridSpacing; for ( float xco = leftXco ; xco <= maxXco ; xco += gridSpacing ) { Line2D gridLine = new Line2D.Float( xco, minYco, xco, maxYco ); gtx.draw( gridLine ); } float numTop = (float)Math.floor( gridHeight / 2f / gridSpacing ); float topYco = centerYco - numTop * gridSpacing; for ( float yco = topYco ; yco <= maxYco ; yco += gridSpacing ) { Line2D gridLine = new Line2D.Float( minXco, yco, maxXco, yco ); gtx.draw( gridLine ); } } |
4. Paint the Margins
The last thing we’ll do in this lesson is paint the margins. We’ll write the paintMargins method to do this. We’ll need to declare a color for the margins:
private Color marginColor = new Color( 0x008080 );
And call the paintMargins method from the paintComponent method:
public void paintComponent( Graphics graphics )
{
    // ...
    drawGrid();
    paintMargins();
}
Each margin will be treated as a filled rectangle. The top margin will have a top-left corner of (x=0, y=0). It fills the window horizontally, so its width will be currWidth. Its height will be equal to the top margin. Here is the code to draw the top margin.
1 2 3 4 5 6 7 8 9 | private void paintMargins() { gtx.setColor( marginColor ); Rectangle2D rect = new Rectangle2D.Float(); // Top Margin rect.setRect( 0, 0, currWidth, topMargin ); gtx.fill( rect ); } |
Recommended exercise: complete painting the remaining margins before looking at the following solution.
Drawing the remaining margins follows a similar pattern. For example, the left margin can be described using coordinates (x=0, y=0), width = leftMargin, height = currHeight. The right margin will have coordinates (x=currWidth – rightMargin, y = 0), etc. Here’s the final solution:
1 2 3 4 5 6 7 8 9 10 11 12 13 14 15 16 17 18 19 20 21 | private void paintMargins() { gtx.setColor( marginColor ); Rectangle2D rect = new Rectangle2D.Float(); // top margin rect.setRect( 0, 0, currWidth, topMargin ); gtx.fill( rect ); // right margin rect.setRect( currWidth - rightMargin, 0, rightMargin, currHeight ); gtx.fill( rect ); // bottom margin rect.setRect( 0, currHeight - bottomMargin, currWidth, bottomMargin ); gtx.fill( rect ); // left margin rect.setRect( 0, 0, leftMargin, currHeight ); gtx.fill( rect ); } |
Summary
So that’s our first stab at a working Cartesian Plane. We still have quite a ways to go, especially if you include all the related tasks that we have yet to address, including encapsulation (we’ve started this with our discussion of instance variables and helper methods, but there are still a lot of pieces outstanding), documentation, and testing. Our next lesson will examine the components that go into our program and round out the encapsulation of its inherent properties.